Printing on wood is a fantastic way to personalize your projects. It adds character and warmth to items like furniture, decorations, or gifts. The unique look of wood helps your designs stand out and makes them special.
However, getting started can feel overwhelming. With so many methods and materials available, it’s easy to feel lost. But don’t worry! By following some straightforward steps, you can simplify the process and achieve great results.
This article will guide you through different methods on how to print on wood. We will cover techniques like inkjet printing, laser engraving, wood burning, decoupage, and sublimation. You’ll find clear explanations and easy-to-follow steps for each method. Plus, there will be tips and tricks to help you avoid common mistakes and achieve great results. With this information, you’ll be ready to create beautiful wooden pieces that showcase your creativity!
5 Methods for Printing on Wood
There are different methods you can use to print on wood:
1. Inkjet Printing

Inkjet printing involves printing directly onto transfer paper designed specifically for this purpose. The transfer paper holds the ink in a way that allows it to adhere well to the wood after it undergoes the transfer process. This method is ideal for projects where vibrant colors and intricate designs are needed.
Steps:
- Prepare the Wood: Start with a smooth wood surface; plywood or MDF are preferred for their flatness and even texture. Sand the wood with fine-grit sandpaper to ensure a smooth finish. Dust off all debris with a clean cloth.
- Reverse the Image: Before printing, open your design in graphic software. Ensure that the image is reversed or mirrored so that it appears correctly once transferred to the wood. This step is crucial for ensuring text or logos are aligned properly.
- Print on Transfer Paper: Load the special inkjet transfer paper into your printer. Make sure to set your printer to the best quality settings to achieve the most detailed print. Print your reversed image onto the transfer paper, allowing it to dry completely.
- Prepare for Transfer: Once printed, cut the image out, leaving a small border around it. This border will help during the transfer process, preventing any fraying of the edges.
- Apply the Image: Lay the printed transfer paper face down on the prepared wood surface. Using a soft application tool like a credit card, gently smooth out any air bubbles, ensuring full contact between the paper and the wood.
- Seal the Wood: Allow the transfer to dry for the recommended time before carefully peeling off the transfer paper. Once the image is completely transferred, spray a clear sealant over it to protect it from scratches, moisture, and fading. Let it cure according to the sealant’s instructions.
2. Laser Engraving
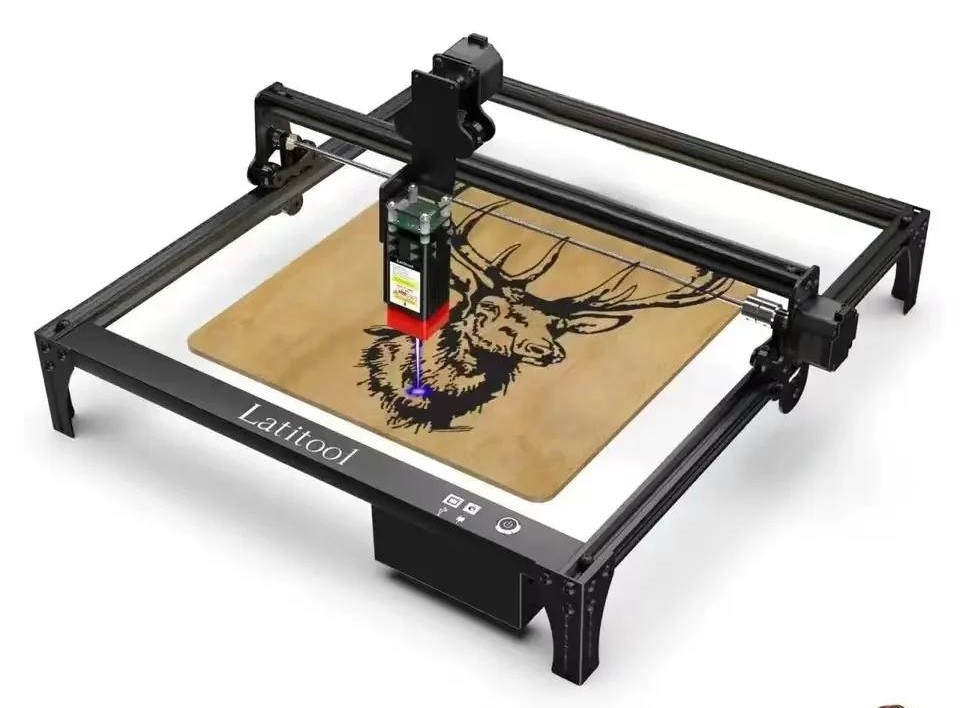
Laser engravers work by burning the surface of the wood to create designs, which can include text, logos, or intricate patterns. This method is advantageous for producing permanent designs that do not peel or fade.
Steps:
- Design Preparation: Create a detailed vector graphic using design software such as Adobe Illustrator. It’s important that your design is compatible with the laser engraver software. Ensure it’s sized appropriately for your wood piece.
- Set Up the Machine: Position your wood on the engraver’s bed. Lock it in place using clamps or tape so that it doesn’t shift during the engraving process.
- Adjust Settings: Based on the type of wood you’re using, adjust the laser settings. This includes power and speed to achieve the desired depth of engraving. Each type of wood may require different settings to avoid burning or not engraving deeply enough.
- Engrave the Design: Start the laser engraver and closely monitor the process. The machine will etch out your design into the surface of the wood. Depending on the complexity, this can take several minutes.
- Clean the Surface: After the engraving is complete, use a soft cloth or brush to wipe away any soot or debris created from the laser.
3. Wood Burn Printing
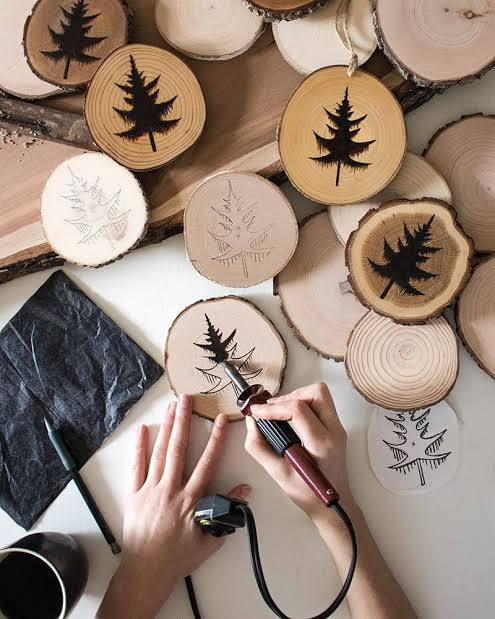
Wood burning, also known as pyrography, is a traditional technique that utilizes a heated tool to burn designs directly onto the wood.
This method involves using a pyrography pen to create designs by throttling the tool’s temperature and pressure, allowing the user to achieve varying intensities and effects. It’s an artistic approach that gives a handmade, rustic look to each piece.
Steps:
- Sketch Your Design: Using a pencil, lightly draw your design directly onto the wood. This serves as a guide for your burning process. Stencils can also be helpful for intricate patterns.
- Set Up the Wood Burning Tool: Plug in your pyrography pen and let it heat up according to the manufacturer’s instructions. Choose the appropriate tip based on the design you will be creating.
- Begin Burning: Carefully trace your design using the heated tip of the pyrography pen. You can vary your pressure and speed to create different effects—lighter pressure creates a finer line, while heavier pressure produces a darker mark.
- Finalize the Piece: Once you’ve completed the burning, go around the edges to smooth out any splinters. If desired, sand the edges lightly to achieve a refined look. To finish, you can apply a clear varnish or wax to protect the surface and enhance its appearance.
4. Decoupage Technique
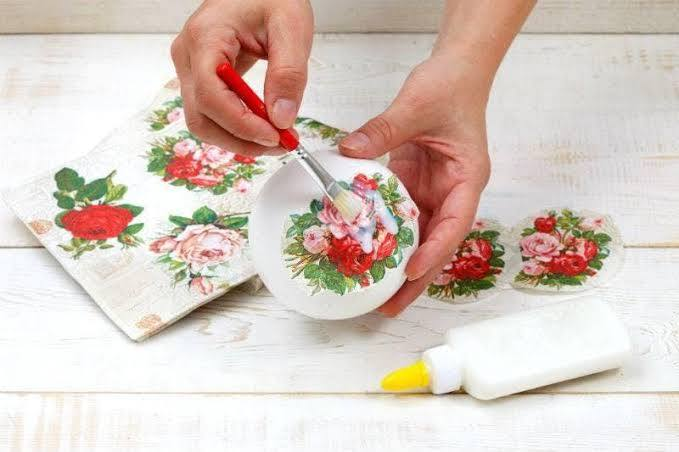
Decoupage allows for creative applications of images onto wood surfaces, giving projects a unique flair through layering and adhesive finishes.
This technique involves adhering decorative paper, images, or fabric to wood with an adhesive that dries clear, resulting in a smooth and artistic finish. It’s versatile, ideal for collages or mixed artistic styles.
Steps:
- Select Images: Choose your decorative paper, printed patterns, or other materials that you want to apply to your wood piece. Consider the color scheme and the overall aesthetic you prefer.
- Cut Out the Images: Carefully trim the images using sharp scissors or a craft knife. The more precise your cuts, the cleaner your finished piece will appear.
- Prepare the Wood: As with other methods, ensure the wood surface is smooth by sanding it thoroughly. Dust off any debris.
- Apply Glue on Wood: Using a brush, apply a thin layer of decoupage glue to the section of wood where you want the image to go. Ensure even coverage to help the image stick properly.
- Place the Image: Carefully place the cut-out image onto the glued section. Smooth it out gently using your fingers to eliminate air bubbles and wrinkles. Continue applying images until the design is complete.
- Seal with Glue: After the images are in place and the glue has dried, apply an additional layer of decoupage glue over the top of the images. This layer acts as a sealant and should also cover any edges of the paper to prevent peeling.
- Protect the Surface: Once completely dry, apply a clear sealant to guard your artwork from scratches and moisture, enhancing its longevity.
5. Sublimation Printing
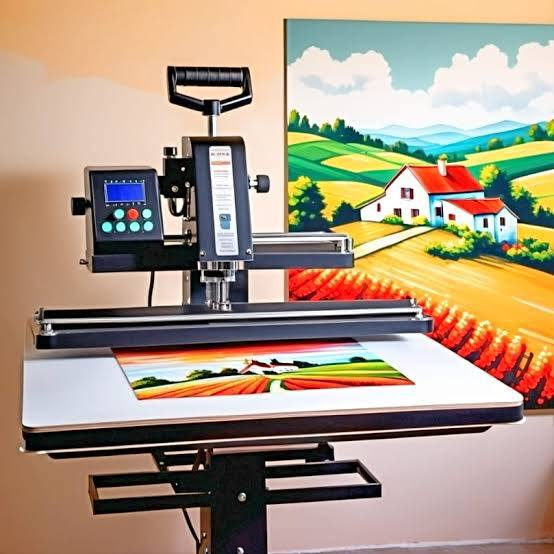
Sublimation printing allows vibrant colors and detailed images to be embedded into specially coated wood.
This technique uses heat to transfer dye from sublimation paper onto wood, where the dye turns into gas and penetrates the surface. This results in vivid, durable prints that are less prone to damage.
Steps:
- Design Your Image: Use graphic design software to create or alter your artwork. Ensure that the design is compatible with sublimation printing and fits the dimensions of your wood piece.
- Prepare the Wood: Select wood that has a specially coated surface for sublimation, ensuring that it’s clean and smooth.
- Heat Press the Image: Print your design on sublimation paper with a sublimation printer. Align this paper over your wood, securing it with heat-resistant tape.
- Press with Heat: Use a heat press at the recommended temperature and pressure for the time specified in your heat press manual. This process usually takes a few minutes, but results in a permanent transfer of the image to the wood.
- Cool Down: After pressing, allow the wood to cool completely before gently peeling away the sublimation paper, unveiling a beautifully finished product.
Tips and Tricks for Printing on Wood
When working with wood, certain factors can make the process easier or hinder your results. Here are some common pitfalls to avoid, as well as some practices to enhance your printing experience.
What to Avoid When Printing on Wood:
1. Skipping Surface Preparation: Failing to properly sand and clean the wood surface can lead to poor adhesion and an uneven print. Make it a habit to thoroughly prepare your wood before any printing begins.
2. Using Low-Quality Materials: Cheap or inappropriate inks, papers, and sealants can have adverse effects. Always invest in quality materials specifically designed for wood printing to ensure longevity and vibrancy.
3. Rushing the Drying Process: Each method of printing often requires drying or curing time. Don’t rush this step. Allow your design to dry completely before moving on to sealing or further handling; otherwise, you risk smudging or damaging your print.
4. Ignoring Environmental Conditions: Temperature and humidity can influence the printing process. Avoid working in overly humid or extremely dry conditions, as either can impact the ink’s performance and adhesion.
5. Neglecting Test Prints: Before committing a complex design to your final piece, do test prints on scrap wood. This can help you troubleshoot any issues with color or alignment before working on your primary project.
6. Using the Wrong Printer Settings: Incorrect printer settings can lead to images that are either too light or pixelated. Always select high-quality print settings and make sure your printer is calibrated correctly.
Tips to Make Printing on Wood Smoother
1. Select the Right Wood Type: Softer woods like pine or plywood usually work well with most printing techniques. If you’re looking for a more polished look, consider using birch plywood or maple, as they feature a tighter wood grain.
2. Experiment with Sealants: Some sealants can affect how ink or glue adheres to wood. Conduct tests with different sealants before applying them to your final project to see how they impact your prints.
3. Maintain Consistent Pressure: Whether you’re using a heat press, pyrography pen, or a transfer method, applying consistent pressure helps ensure an even transfer. Uneven pressure can lead to blotchy areas or incomplete prints.
4. Use High-Quality Transfer Papers: If you’re employing transfer paper for inkjet printing, ensure you use high-quality, compatible transfer materials. This will enhance the print quality and reduce the likelihood of peeling edges.
5. Utilize a Dust-Free Environment: Working in a dust-free area minimizes the risk of contaminants interfering with adhesive processes or ink adhesion. Consider setting up your workspace in a clean room or regularly vacuuming to keep the area tidy.
6. Follow Manufacturer Guidelines: Whenever you’re operating equipment like laser engravers or heat presses, closely follow the manufacturer’s instructions regarding settings and usage. This ensures safety and helps achieve the best results.
7. Practice Patience: Finally, take your time during each step of your printing process. Rushing can often lead to mistakes that may compromise the appearance and durability of your finished work.
By exploring these various methods, you can find the right technique to suit your creative needs. Each method provides a unique avenue for expression, whether you opt for the precision of laser engraving or the artistry of wood burning. Let your imagination guide you as you create personalized wooden items that showcase your style and creativity.
Don’t forget to avoid the common mistakes mentioned in the article, and implement these tips into your workflow. You’ll find that printing on wood can be more enjoyable and yield better results.